
The core Dimraeth Minotaur Brawler stun interaction is a keystone that converts basic attacks to Blunt damage. Blunt contributes strongly to hidden Stun Build-up; when that buildup fills, the enemy becomes stunned. The conversion and its prerequisites belong to the build, rather than being assumed present on every fresh Minotaur.
This explains the direction, but it is not a verified complete allocation. No universal stun threshold, duration or permanent-boss-control loop is established here. A successful Bleed-focused Minotaur fight should not be relabelled as a demonstration of this stun build.
Minotaur Brawler stun components
| Component | Role | What to check on the character |
|---|---|---|
| Blunt-conversion keystone | Changes the basic-attack damage interaction | Exact node, prerequisites and selected state |
| Basic attacks that connect | Contribute to the intended attack and recovery rhythm | Target contact and safe openings |
| A complementary active action | Adds a useful job to the sequence | Its real damage type, control behaviour and cost |
| Movement or defence | Keeps the character alive while building toward control | Availability after modifier changes |
| Equipment or pet support | Supports the chosen sequence if its conditions are met | Actual effect description and dependencies |
The table is a component checklist, not a finished five-slot recommendation. The current exact path and point total to the conversion need to be read from the relevant tree.
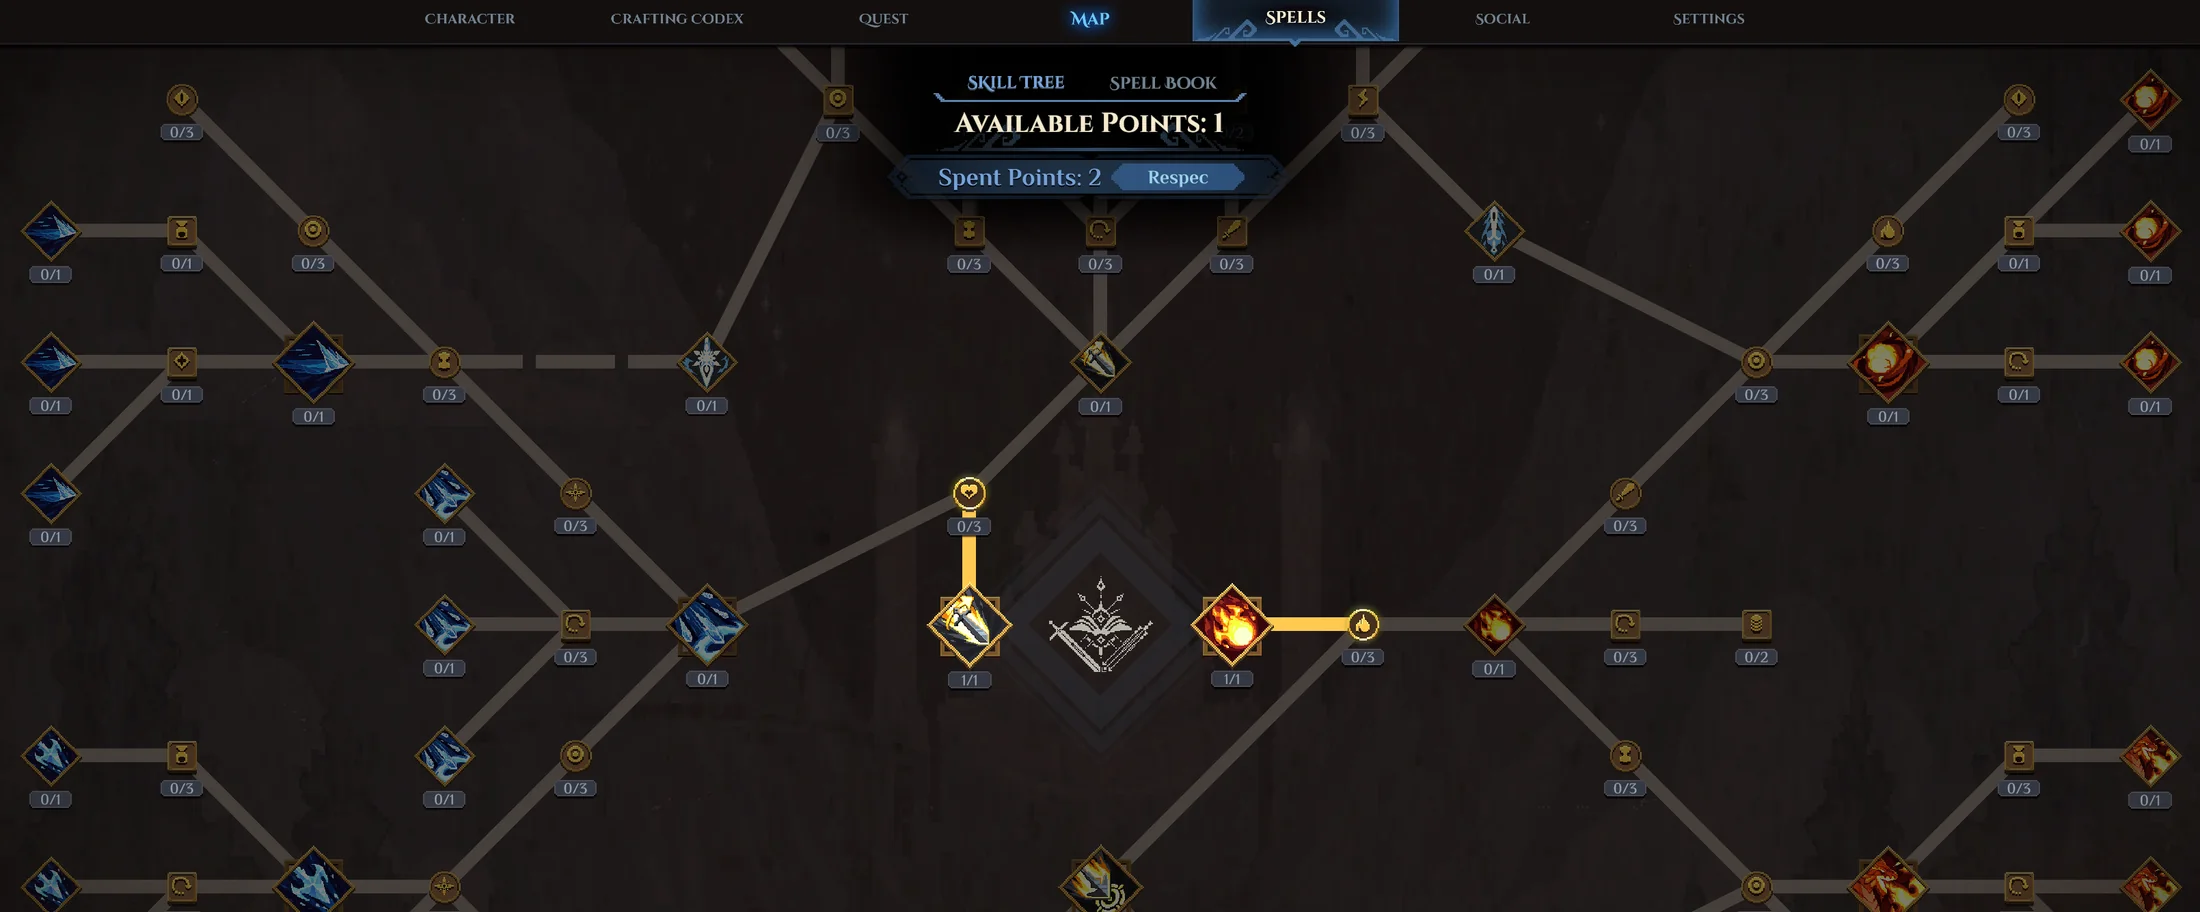
The connected tree illustrates prerequisites and spell branches. The conversion node is not marked in this development image, so it should not be used as a click-by-click allocation map.
Stun buildup is not an immediate guarantee
An attack contributing to buildup is not the same as an attack guaranteeing a stun on every hit. The described system accumulates toward a threshold. Without a verified target-specific test, do not assume a fixed number of hits or identical behaviour on every boss.
Plan to survive the period before control occurs. A character that needs the next hit to stun in order to avoid damage can be vulnerable when the target does not reach the threshold at that moment.
Use a safe opening for basic attacks, then respond to the enemy's next action. Do not treat the control direction as permission to ignore telegraphs or spend all resources before you know the target is disabled.
Candidate actions and observed choices
Quick Jab and Pulverize appear in Blunt and control-related discussion. Boulder Toss is considered as an option if the character changes toward Blunt. Considering the option does not establish that it was equipped in a completed stun configuration.
Inspect the action's description on your own character and decide which job it serves. A skill can contribute damage, control or positioning, but a familiar name does not prove every modifier or version has the same behaviour.
Pulverize also illustrates a commitment risk: a long action can leave the character taking hits while trying to finish it. Pick an opening suited to the action rather than assuming the build's control theme makes every commitment safe.
Keep the movement tool that the sequence needs
Vortex is valued for movement in the Minotaur material. Changing its form can alter the escape or repositioning available after an attack. Before taking such a modifier, decide whether another action now covers that job.
This matters especially when the stun has not yet triggered. You still need a way to deal with an enemy response. Extra damage is not a complete replacement for the movement that made the preceding attack safe.
The Dimraeth movement guide separates ordinary movement, stamina and committed actions. Those fundamentals remain relevant even when the build aims to control its target.
Keep Bleed and stun configurations separate
The long Minotaur example develops a Bleed direction with changing Vortex, Pulverize and Rage responsibilities. It includes valuable lessons about resources and mobility, but it does not supply a final stun tree merely because the character is a Minotaur Brawler.
Do not combine a Bleed payoff, an imagined Blunt route and equipment from another stage into one supposedly demonstrated setup. Each selected action needs its generator, condition and prerequisites in the actual configuration.
The Dimraeth class guide compares those directions without treating them as interchangeable. Use it to decide which interaction you want before committing further points.
A useful control test
After obtaining the conversion, use a familiar target and confirm the selected node, equipped actions and relevant effects. Observe whether the basic attacks connect and when control occurs. Keep the setup consistent before drawing conclusions about an additional modifier.
Record a failed attempt as well as a successful one. If control arrived too late, inspect the opening and survival plan. If the resource sequence stopped, inspect the generator. If a different enemy behaves differently, do not force the first result into a universal threshold.
The missing full allocation prevents this page from serving as an exact copyable build. The supported interaction still gives you a concrete direction to investigate, with movement and recovery retained while the control plan develops.