
Dimraeth supports keyboard-and-mouse movement and controller play. Check the bindings in your current layout, then separate ordinary movement, exploration sprinting and combat actions. If your character suddenly moves slowly, inspect carrying weight before assuming the race or class is responsible. If a dodge or attack fails, check stamina and the action you are already performing.
Movement is also part of resource management. You need openings to land basic attacks, room to finish committed actions and a route out when an enemy begins an attack. Running toward the next target without checking those conditions can leave you unable to use the action you intended.
Dimraeth movement inputs and aiming
The game supports keyboard-and-mouse play, including a WASD-and-mouse arrangement, as well as controllers. Use the current settings to verify movement, sprint, dodge, block and spell inputs. Rebound controls and controller layouts mean that a key shown in someone else's setup should not override the prompt on your own screen.
Controller guidance includes automatic aiming, pressing the right stick to lock on and an option to attack toward the direction the character faces. These choices affect targeting, which is distinct from moving the character. If your attack travels toward the wrong enemy, investigate aiming before deciding the left stick is moving incorrectly.
| Input problem | First check | Useful adjustment |
|---|---|---|
| Character moves but attacks face the wrong way | Target lock and aiming mode | Choose a targeting behaviour you can predict |
| A skill button triggers something unexpected | Active spell slot and binding | Compare the icon and the displayed input |
| Running works outside battle but feels different in danger | Exploration sprint setting and combat state | Compare movement in the same state |
| Movement slows after gathering | Carried weight and heavy materials | Store or process supplies before testing again |
| Defensive action fails after several attacks | Stamina and current animation | Leave a shorter attack sequence and a recovery opening |
A recorded controller arrangement uses the left stick for movement and holds X to run. That is a layout example, not a verified default for every controller or version. The same player later rebinds active skills, which is a good reason to check the current interface rather than memorising an isolated button from a guide.
Make aiming predictable before adding spells
Try the aiming modes in a familiar area. Face a target, move around it and observe where an ordinary attack goes. Then try a spell you understand. Keep the test small enough that a failure tells you something about the input rather than the whole build.
If you use lock-on, make sure the selected enemy is the one you intended to approach. If you use facing-based attacks, pay attention to the character's facing after repositioning. Neither preference is automatically stronger; consistency is what makes your attack and retreat decisions reliable.
Exploration sprinting and slow movement
An exploration auto-sprint option appears in the recorded settings. It is worth checking if walking between encounters feels unusually slow. Its purpose is exploration movement; do not assume the same behaviour applies during every combat action.
Check the option while safe, move through a short familiar stretch and compare the result. Use the same character, load and combat state for the comparison. Otherwise you may attribute a weight change or a different action to the setting you just changed.
Heavy bags are a separate source of slow travel. Construction supplies such as wood products and stone can build up during a trip. If the slowdown started after gathering or looting, open the character or inventory information and inspect the weight display before changing anything in the skill tree.
A sensible response is to return useful bulk supplies to storage, process what you need for your immediate objective and then test movement again. Avoid indiscriminately discarding rare ingredients merely to remove weight. Decide what the next craft needs and preserve those materials.
This guide does not give a universal weight threshold or a percentage slowdown. The actionable information is the relationship between load and the change you noticed. The current display is the right place to check whether the character is overburdened.
Combat movement and stamina
Movement during a fight is more than holding a direction. Attacks, defensive actions and some spells require commitments. A character partway through an action may not respond as though it were standing idle, and a character without sufficient stamina cannot be treated as though it had a full resource bar.
Start a difficult encounter by watching one attack pattern. Notice when the enemy commits, where the danger lands and where you can stand afterward. Then choose a short response. Adding another attack is only useful if you can still leave before the next threat reaches you.
A common mistake is using the entire safe opening for damage and expecting a defensive input to erase the remaining risk. Instead, stop the attack chain earlier when the enemy is about to act. Keeping enough room and resource to move away can matter more than completing one additional hit.
The third basic hit has its own Final Attack interactions. That makes finishing the chain attractive, but it does not make the third hit mandatory in every opening. If the target begins a dangerous response, disengage rather than forcing a trigger at the cost of taking an avoidable hit.
Separate positioning from invulnerability
Moving out of an attack's path and ignoring damage during an invulnerable window are different protections. The available material contains conflicting descriptions of dodge invulnerability. This guide therefore does not promise a safe frame window for every race or defensive action.
Use movement to put distance between your character and the danger you can see. Do not base an entire fight on passing through a hit at a particular instant unless you have verified that interaction for the current action and version. This advice still applies even if an individual move does provide protection.
Blocking and dodging should also be examined as distinct actions. An observation about protection while blocking does not establish what happens during every dodge. Read the action available to your character, then test its behaviour without assuming the names are interchangeable.
Race, class and movement skills
A fresh character's movement is not the complete movement kit of a developed build. New skills can add ways to close distance, reposition or leave a dangerous area. Evaluate those tools separately from ordinary running speed.
Minotaur Brawler gives a useful example. The early attack rhythm is deliberate, while access to Vortex changes how the character can move through a fight. A later version of the build can therefore feel more mobile without proving that the basic running speed changed.
Vortex modifier choices also illustrate an important trade: altering a skill for another benefit may change the movement you relied on. Before choosing a stationary or otherwise changed form, ask where the escape route will come from afterward. A damage improvement can be a practical loss if it removes the action that kept you alive.
Do not copy a modifier solely because its description sounds stronger. Check what your own version of the skill does, what selecting the modifier changes and which existing job would disappear. The Dimraeth skill-tree guide explains how those choices fit into the larger tree.
Spacing for attacks and Concentration recovery
Basic attacks that connect restore Concentration during combat. Positioning therefore affects both damage and the ability to keep casting. Missing repeatedly while trying to recover can make the character feel resource-starved even though the recovery mechanic is working as described.
Move into a range where your ordinary attack can actually hit, wait for a manageable opening and use the attack without immediately spending the restored resource on an unnecessary action. Then reposition before continuing the spell sequence.
Human characters have sword and crossbow switching in their racial kit. That offers a different spacing decision from a character whose basic weapon rhythm remains close to the target. Weapon Swap itself has a cost in the recorded examples, so constantly changing forms is not automatically an efficient recovery plan.
For a caster, do not assume movement should always maximise distance. You need a position from which your available recovery attack can hit while leaving room to avoid the next threat. That position depends on the weapon form and the encounter, not simply on whether the class is called Mage.
If the intended action is missing from your controls, use the Dimraeth spell-equipping guide to check assignment and input behaviour before treating the problem as a movement limitation.
Long attacks and dangerous ground
Some skills ask you to remain committed longer than a basic attack. That can be useful when the target is vulnerable, but it becomes risky when an enemy is winding up or an area effect is forming under you.
Pulverize provides a practical example from Minotaur play: the long action can leave the character taking hits while trying to finish it. The lesson is to choose an opening that suits the action. It is not evidence that the skill is universally bad or that every animation can be cancelled at will.
For charged spells, include the preparation time in your decision. Starting a charge from a position that will become dangerous before release is a positioning error even if the spell eventually deals good damage. Practise the action's timing before making it the centre of a crowded encounter.
Ground effects require a similarly direct response. If you are taking repeated damage while concentrating on the target, look beneath the character and move out of the affected area. Do not assume that surviving one tick means it is safe to finish an extended sequence in the same place.
Map crystals and fast travel
Revealing the map, activating a travel point and travelling are separate activities. Map crystals help reveal the area. Travel points provide movement between locations once their relevant conditions are met. Treating every map object as a teleport can make navigation more confusing than it needs to be.
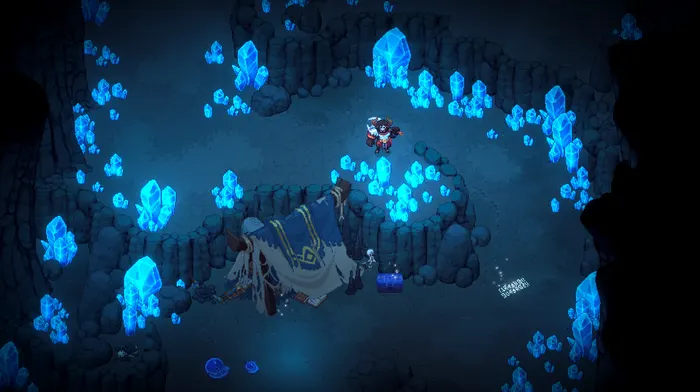
Crystal-cavern exploration in Dimraeth. Use landmarks to maintain your route; this scene does not identify every crystal as a travel point.
When reaching a new landmark, inspect its interaction and what changes on the map. Notice whether you revealed information, activated a destination or arrived at a location that was already accessible. Those outcomes serve different purposes on the next trip.
Use quest tracking together with the map rather than following a marker without checking the surrounding terrain. A short detour to activate a useful travel location can reduce the distance of later crafting and quest-return trips. That is a route-planning recommendation, not a promise that every objective has a nearby teleport.
The exact map shortcut differs by layout and should be checked in the controls. If an overlay obscures the movement view, close it using the displayed prompt before assuming the character has stopped responding.
Prepare the return trip before overloading
Gathering and combat often happen on the same trip, but their preparation needs can conflict. Construction materials take carrying space, while a combat route asks for usable consumables and a manageable load. Decide whether your next outing is primarily for a specific ingredient, an objective or an encounter.
For a material run, identify the processing stage you actually need. Bringing back another stack of raw wood does not necessarily complete a recipe that asks for planks. Check the Dimraeth crafting guide before leaving with an unclear list.
For a combat trip, prepare your spell and item slots, rest as appropriate and check charges. Backpack access can be restricted during combat, so relying on a mid-fight inventory correction can turn a small preparation mistake into a movement emergency.
If a fight goes wrong, retreat toward space you understand. Chasing damage into an unfamiliar area makes it harder to read both the enemy and your route out. A short reset of position is often a better test of the build than another attempt made while overburdened or unprepared.
A short movement troubleshooting routine
Use this sequence when the character suddenly feels different:
- Check whether you are exploring, fighting or still committed to an action.
- Inspect weight and recent additions to the bag.
- Check stamina and any resource required by the action you are pressing.
- Confirm the current target, aiming mode and active binding.
- Review a recently changed movement-skill modifier.
- Compare the behaviour in a safe, familiar area after changing one thing.
This routine separates a control problem from a resource problem and a build change. It also avoids spending skill points to fix a heavy bag or rebinding movement to fix a spell that was assigned to the wrong slot.
Once the basic controls behave predictably, improve your encounter timing: approach with a route out, attack during a real opening, land the hits needed for recovery and leave before the enemy's next commitment reaches you. Those habits remain useful across the different race and class combinations.